Camelia recently shared her journey of achieving the perfect fit for her Saint-Germain Wrap Dress, and it was truly inspiring! From the very beginning, she emphasized the importance of understanding her own body and using the muslin process to its fullest potential. She didn’t just stop at one muslin; she went ahead and created two, ensuring that every detail was just right. Her photos and explanations in this post showcase how she tackled her fit challenges step by step—without spending too much time on it. She’s here to guide you through her process in the latest edition of our blog series, The Fitting Room.

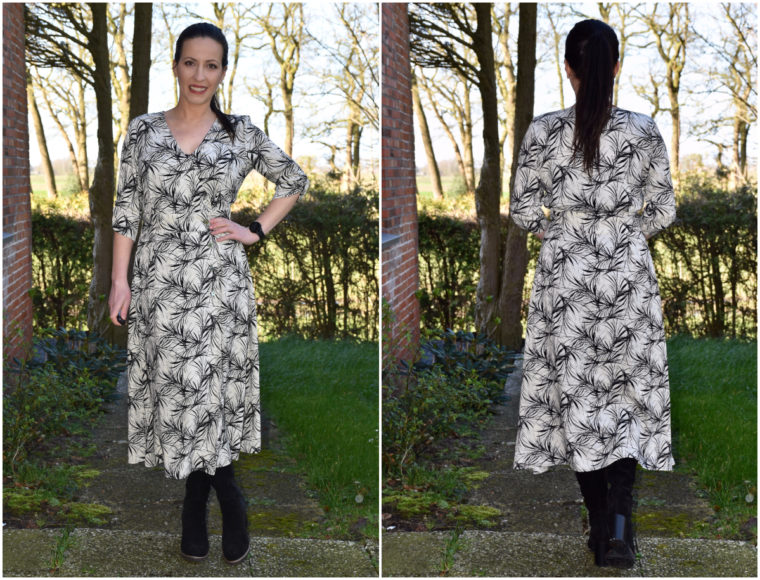
I fell in love with the Saint-Germain Wrap Dress the moment it was released—both the original version and Liesl’s floral rendition. It’s simply elegant and romantic.
For my final dress, I chose rayon fabric. However, before cutting into my precious fabric, I always make a muslin. Over time, I’ve realized that certain adjustments are almost always necessary for woven patterns: a swayback adjustment, a narrow shoulder adjustment, and a full bust adjustment.
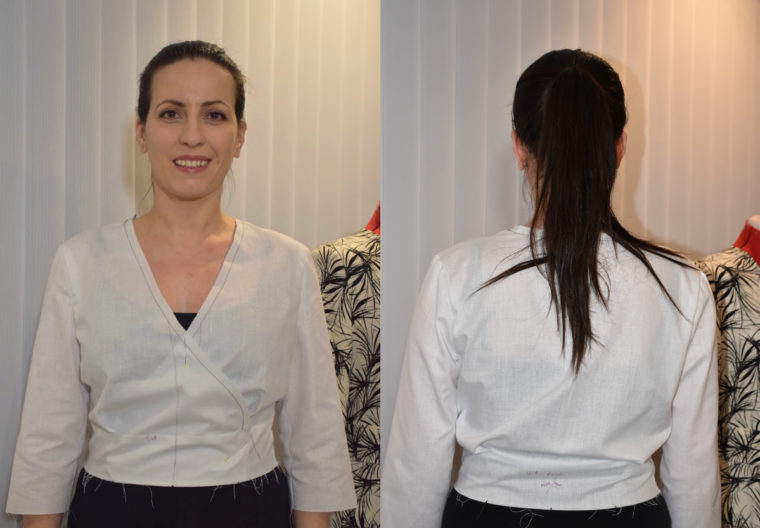
In this case, I implemented all three. This was my bodice muslin before any alterations. I started with the size 10 B cup, based on my measurements. Since the skirt already had enough ease over the hips, I skipped muslin-ing it.
Initially, I used thin cotton for the muslin. My final fabric is rayon with a slight stretch. Looking back, this wasn’t the best choice, as it’s always ideal to use the same type of fabric for your muslin as you plan to use for your final garment. It makes achieving a precise fit much easier when the fabrics have similar stretch, weight, and drape.
As you can see in the photos above, the center front of the bodice doesn’t align with my natural center front, the shoulder seam is too long and doesn’t sit properly at my shoulder point, and there’s excessive length in the center back.
There are multiple methods to perform a full bust adjustment: the slash method, which involves adding a dart (as shown in the sew-along); the seam manipulation method; and the pivot-and-slide method (you can find our tutorial for that here).
This time around, I decided to try the pivot-and-slide method since the dress pattern doesn’t have a dart and I wanted to see if I could achieve a great fit without introducing one. I added 1.5 cm (5/8â€) to the bust.
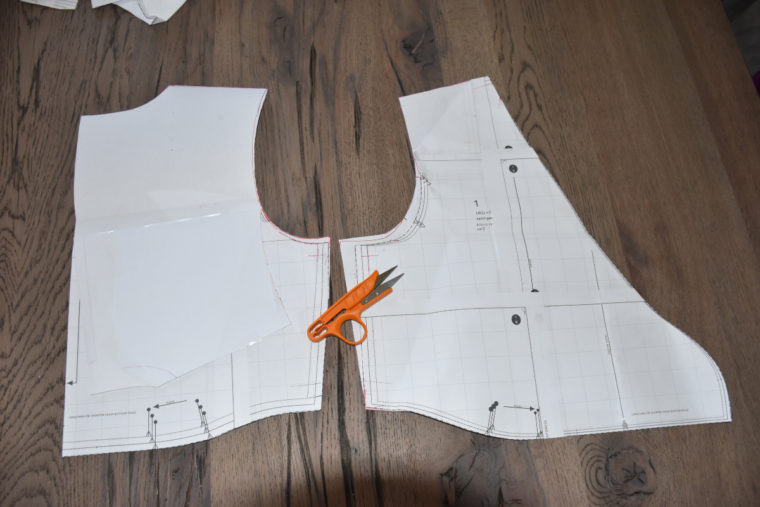
Additionally, I removed 1 cm (3/8â€) from the shoulder seam in a narrow shoulder adjustment (tutorial available here) and subtracted 2 cm (3/4â€) in a swayback adjustment. Below are my final adjusted pattern pieces.
Here’s my second muslin after all the pattern adjustments. As you can see, the center front now aligns with my natural center front, and the fit in the back has significantly improved.
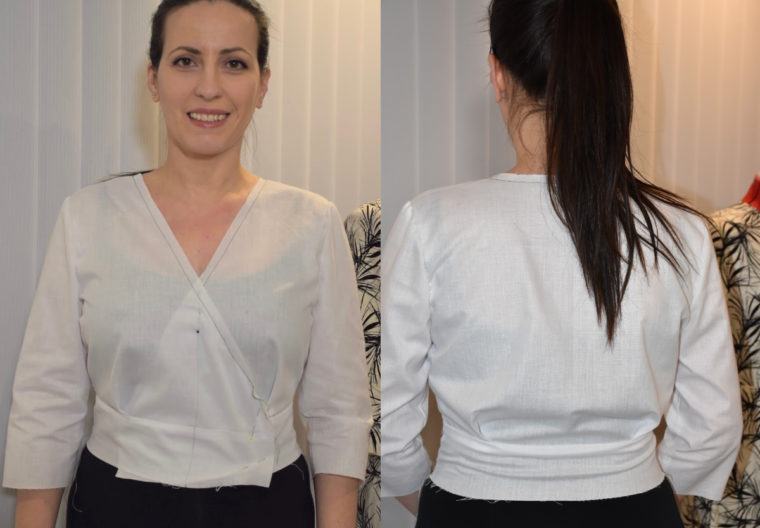
These modifications were incredibly straightforward and didn’t take much time at all. Now I have a pattern that fits me exactly how I envisioned, and I can use it repeatedly.
I genuinely enjoy doing the fitting work before diving into my good fabric. Knowing that the final garment will fit perfectly makes the entire sewing process much more enjoyable. It ensures that no fabric or time goes to waste.
If you’re passionate about tailoring garments to fit your unique shape, feel free to share your experiences with Liesl + Co. or Oliver + S patterns. We’d love to hear from you! Reach out at contributors@oliverands.com if you’d like to contribute your story.
Are you a fitting enthusiast? Do you rely on proven fitting techniques to personalize your creations? Drop us a note if you're inspired to write about your fitting journey with Liesl + Co. or Oliver + S garments. We’d be thrilled to feature your story!
Women Socks,Non-Slip Invisible Socks,Eco-Friendly Socks Women,Boat Socks
Shaoxing Evergreen Knitting Co., Ltd. , https://www.egsock.com